Build Your Own Ship Tracker
Receive real AIS messages and see live ships on Mastchain.io
This guide walks you through everything, from picking the right hardware, testing it on your computer, and finally running it 24/7 on a Raspberry Pi.
You don’t need any radio or coding background. If you can copy and paste a few lines, you can do this!
Part 1: What You Need
Goal
You’ll use a small USB radio (called an SDR) to listen to ship signals and send them to your Mastchain dashboard.
Shopping List
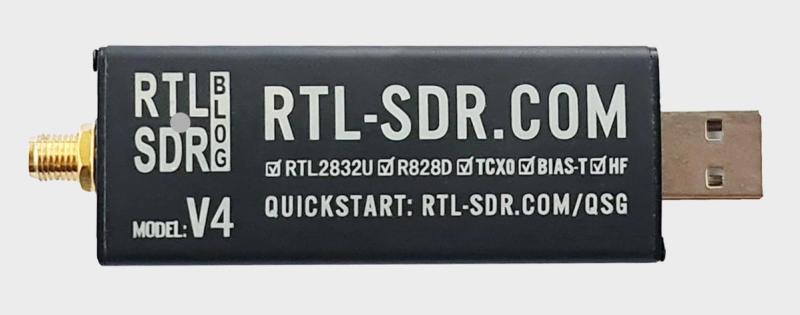
- SDR Receiver: RTL-SDR Blog V3
Reliable, affordable (~$40), works everywhere - Antenna: A marine VHF (162 MHz) antenna or a 46 cm whip
The taller and clearer the placement, the better your range - Cables: Low-loss coaxial cable such as RG58 and a USB extension
Low-loss coaxial for connection between antenna and sdr and a USB extension to keep the SDR away from computer noise - Optional: Outdoor mount or enclosure
Great for permanent setups
💡 Tip: You’ll get the best range with an antenna outdoors with a clear view of the water.
Part 2: Test on Your PC or Mac
We’ll first make sure you can receive real messages and see them appear in your Mastchain dashboard.
Step 1: If You’re Using Windows
- Plug in your RTL-SDR dongle.
- Download Zadig (search “Zadig RTL-SDR”) and run it.
- Choose RTL2832U from the list and click “Install Driver” (WinUSB).
- Download AIS-catcher for Windows from the AIS-catcher GitHub Releases.
- Unzip it, open the folder, and double-click AIS-catcher.exe.
To test:
AIS-catcher -v 60You should start seeing lines like:
!AIVDM,1,1,,A,13aG;P001oJr`TpN>p<4Owvl0@EJ,0*7CThose are real AIS messages from ships!
Step 2: If You’re Using Mac
- Open Terminal (Applications → Utilities → Terminal).
- Run these commands (one by one):
brew install rtl-sdr

brew install ais-catcher
Plug in your RTL-SDR and run:
AIS-catcher -v 60You’ll see similar !AIVDM messages scroll by.
💡 How to open a Terminal
- Windows: press Windows key + R, type cmd, then press Enter — this opens the Command Prompt. (If you installed Git, you can also use “Git Bash” — it works the same way.)
- Mac: open Finder → Applications → Utilities → Terminal.
- Raspberry Pi: if you’re using the desktop, click the black terminal icon on the top bar. If you’re connected remotely, open a terminal on your computer and type ssh pi@raspberrypi.local.
Step 3: Sign up on Mastchain
- Go to 👉 https://app.mastchain.io
- Click “Sign in with Google” to access your personal dashboard.
- Once logged in, you’ll be presented with an onboarding that will guide you through the setup.
- On the third step of the guide you’ll find the command to use to connect your station to the network. It should show something like:
ais-catcher.exe -H https://api.mastchain.io/api/upload USERPWD youremail@domain.com:abcEg7a…ktKFhMZV7o5gT5GdA= INTERVAL 60✅ What it does:
- Sends your decoded AIS data every 60 seconds
- Uses HTTP (no compression) — exactly what Mastchain expects
- Lets you identify your receiver with your email and station credentials
Step 4: Connect to Mastchain
Now let’s send your data to the Mastchain network so you can see your ships on the live map!
Run the command shown during the onboarding on your windows terminal
After a minute or two, go back to your Mastchain dashboard → app.mastchain.io You should see ships start to appear near your location!
🎉 Congratulations — you just made your first live connection! You’re officially part of the Mastchain network and you’re earning $MAST tokens as reward.
Part 3: Run It 24/7 on a Raspberry Pi
Once you’ve confirmed everything works on your computer, move your setup to a Raspberry Pi for continuous operation.
Step 1: Get Your Pi Ready
You’ll need:
- Raspberry Pi 3, 4, or 400
- MicroSD card (16 GB or more)
- Power supply
- Internet connection (Wi-Fi or Ethernet)
Use Raspberry Pi Imager to install Raspberry Pi OS (Lite or Desktop).
Boot your Pi, open a terminal (or SSH in).
Step 2: Install AIS-catcher on the Pi
Copy and paste the following commands one by one:
sudo apt update

sudo apt upgrade -y

sudo apt install git make gcc g++ cmake pkg-config libsqlite3-dev librtlsdr-dev libairspy-dev libairspyhf-dev libhackrf-dev -y

sudo apt install libsoapysdr-dev libzmq3-dev libssl-dev zlib1g-dev build-essential -y

git clone https://github.com/jvde-github/AIS-catcher.git

cd AIS-catcher

mkdir build && cd build

cmake ..

make -j4

sudo make install
Then test it:
AIS-catcher -v 60If you see !AIVDM messages — great! You’re receiving AIS on your Pi.
Step 3: Configure Automatic Upload to Mastchain
Let’s make it run continuously, even after restarts.
Create a new service:
sudo nano /etc/systemd/system/aiscatcher.service✏️ Using nano (text editor)
When you see a command like:
sudo nano /etc/systemd/system/aiscatcher.serviceit opens a small text editor inside the terminal.
- Type or paste the text you need to add.
- To save, press Ctrl + O, then hit Enter.
- To close, press Ctrl + X.
That’s all — nano is just a simple way to create or edit files directly on your Pi.
Paste this text inside:
[Unit]

Description=AIS-catcher (Mastchain)

After=network.target

[Service]

ExecStart=/usr/local/bin/AIS-catcher -v 60 -H https://api.mastchain.io/api/submit USERPWD youremail@domain.com:abcEg7a…ktKFhMZV7o5gT5GdA= INTERVAL 60 (use your personal command shown in the guide)

Restart=always

[Install]

WantedBy=multi-user.target

Save and enable it: sudo systemctl daemon-reload

sudo systemctl enable --now aiscatcher
Now your Pi will automatically:
- Start AIS-catcher at boot
- Listen for ships
- Send data to Mastchain every minute
🎉 You’re Done!
You’ve just built your own ship-tracking station that runs 24/7 and contributes to the Mastchain network, earning $MAST tokens continuously.
You can:
- See your local ships on app.mastchain.io
- Move your antenna higher for more range
- Share your station’s coverage with others
Welcome aboard — the fleet is listening! 🚢💙